Showing posts with label studio. Show all posts

Wednesday, September 5, 2012

Fine Straw Hat : making


the finished hat !! I have taken lots of photo's of me making this hat so you (hopefully) can follow the steps required to get such a finish. I started with a beautiful fine straw in a sensational dark cream colour which helps with the whole effect. I'll often hang onto a hood for years before I take the plunge and make a hat out of it as you need all the elements around you that you know will work well together.....as I am moving studio and shop I have uncovered some lovely materials and came across the soft tulle that I draped around the crown of this hat....and so it all began !

below the desk so often so full of 'stuff' you can't see the actual desk but then out of this mess a hat emerges. You can see the hat shape taking place I have just finished wiring the brim and softly letting the edge wave.....I also decided that the edge should have a tiny, tiny edge so as to not distract from the straw and so I chose a satin bias which took me a couple of months to find the exact colour I wanted (an ecru colour)....


Monday, March 5, 2012


this was after the big clean up in January...before the holidays and it's all so tidy in my studio in these photo's......well not anymore it only takes me I'd say around..............4 hours to destroy the tidiness !!

Tuesday, September 27, 2011

Red and Ivory Show Girl !


beautiful, beautiful ! the newest headpiece out of the studio.....a little 'Valentino red' and ivory show girl number.

Tuesday, July 5, 2011

Oh La La Sculptural Feather Hat

the finished product covered in back glossy feathers....oh la la....
......a fine hat !


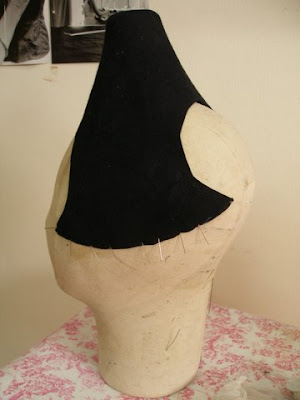
decide on the shape - I have used my trusty poupe (milliners mannequin) to help me decide on the shape detail, note the pins holding all in place while the felt dries on the poupe......

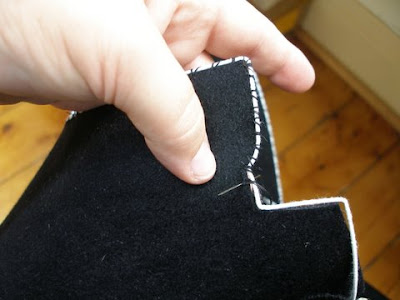
above sew well in the corners the wire will be bound with petersham or velvet eventually to cover completely

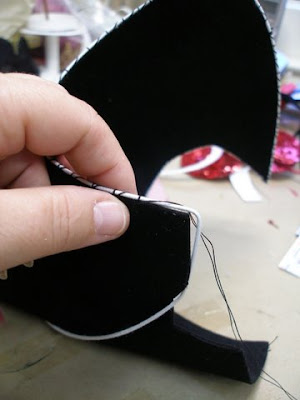
the shape is wired (I have used white wire so that you can see what I am doing but normally I would use black wire) to keep it's shape and note the detail on the tight corners - easiest to bend the wire to fit and sew well at corners.......

Adding Swarovski detail to Black Velvet Flowers


Friday, April 8, 2011

Re Block Before and After photo


A Gentleman's dress hat that had seen better days..........here are the before and after photo's - the customer was very happy as this was his Grand Fathers hat and I made it look a lot better. It now has the added bonus of fitting him after I made alterations to the fit. An all round winner.

Friday, May 28, 2010

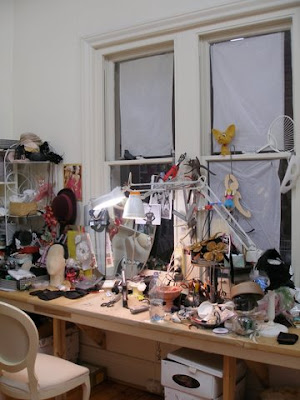
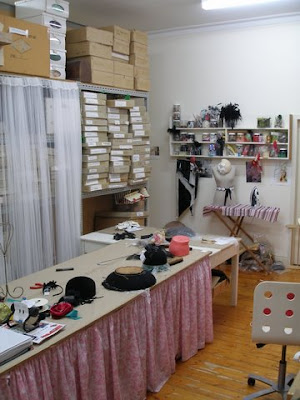
Some scenes from my studio...bit messy!


So here is my studio and some production photo's - this is actually quite tidy as I just had a big clean up. I like to have my ribbons within reach and love how they look all together. I have my velvet ribbons in drawers all colour coded (until I mess it all up!) Tissue paper is on the windows to stop the sun getting in my eyes in summer but as it is winter you will note that although it is only 5.30pm in the afternoon already we have lost the light. I have had daylight fluro lights installed and after they came and did the installation I could not stop looking at the palm of my hand as I could not believe the difference it made everything is so much clearer. I have taken a photo from the shop looking into my studio and as you can see I have the perfect position to see and hear customers coming in and am always working at my desk with one eye out for customers. The baby gate is for....my two dogs Ruby (on the left) and Teddy - they often come to work with me. They spend the whole day pretending to be in jail and trying to get someone to release them. I love the size (my blocks are in the back room and a large storage area as well) of my studio and the natural light from two four big windows is unbeatable - no excuse but to create.
Related Posts with Thumbnails